
Taking Pictures of Stars
You can make beautiful photographs of the constellations, the Milky Way, and a few beautiful "nebulous" objects in the night sky, if you know how to manipulate your camera.
The stars in the night sky are quite lovely, but they are hard to photograph. Try taking a picture of a beautiful night sky with your mobile device. You will probably record nothing but black sky. Using the “full auto” settings of a fancy DSLR camera probably won't work any better. Most “point and shoot” cameras have special features that allow them to adjust the focus and the exposure settings automatically, but these features only work well in “normal” conditions. When there is only darkness and a few dots of light, the cameras become confused. However, many cameras allow you to adjust the settings manually, and if you learn a little about how to do this, then taking pretty photos of the constellations is not too difficult. If you own a DSLR, or you can borrow one, and you learn how to manipulate the exposure settings of the camera, then you can make your own beautiful photographs of the constellations.
The Exposure Settings of Your Camera
The main trick is simply to make a very long exposure. When you press the shutter release on most cameras, it “opens its eye,” so to speak, records the scene for a split second, and then closes the “eye” or the shutter again. In daytime, a tiny fraction of a second is enough, but when the scene is dark, the shutter needs to stay open for a much longer time. For nice constellation photographs, I find that 20 or 30 seconds is about right for starters.
You can also make a dark scene brighter by widening the aperture, and by increasing the sensitivity, or ISO value. However, you don't want to increase the sensitivity too much, because then there will be lots of thermal sensor noise, which appears as “graininess” in the background.
If you try to take pictures like this, you will probably find that something else goes wrong that you will need to fix. Under normal circumstances, the camera can “autofocus” using details within the scene. But when there are no details in the scene other than a few points of light, you may find that the camera's focus motor runs for a few seconds while it tries to find the right focal distance, then it gives up and you can only see blurriness through the viewfinder. Your camera is unable to focus itself when you point it at the stars. However, this problem is usually not too difficult to fix. Just take a picture of something bright and far away, so that the camera sets itself to focus on far away things, then flip the switch from “auto focus” to “manual focus” and be careful not to bump the focus again after that.
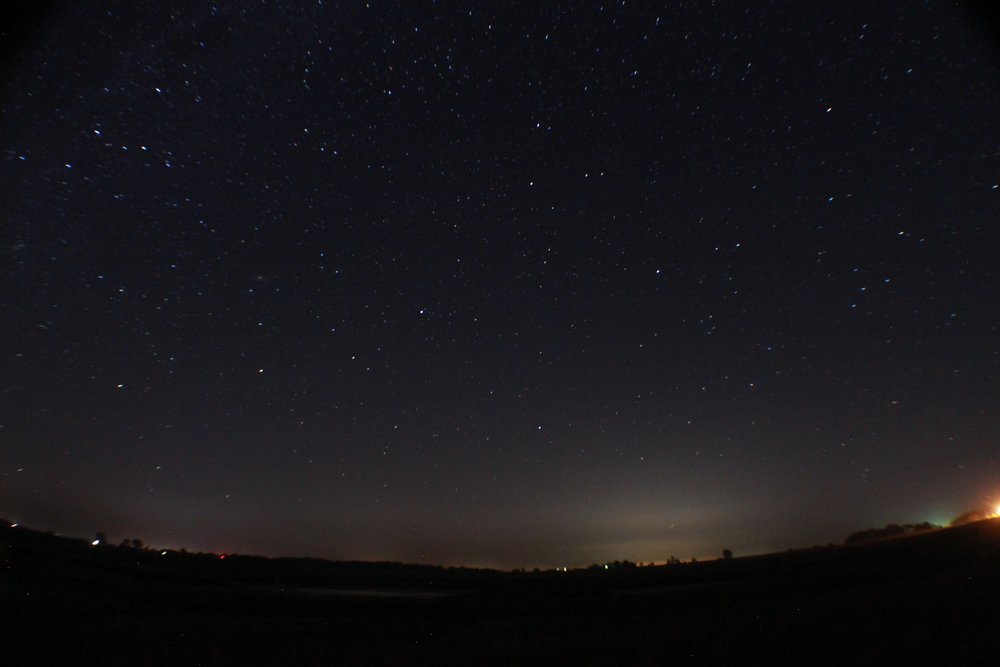
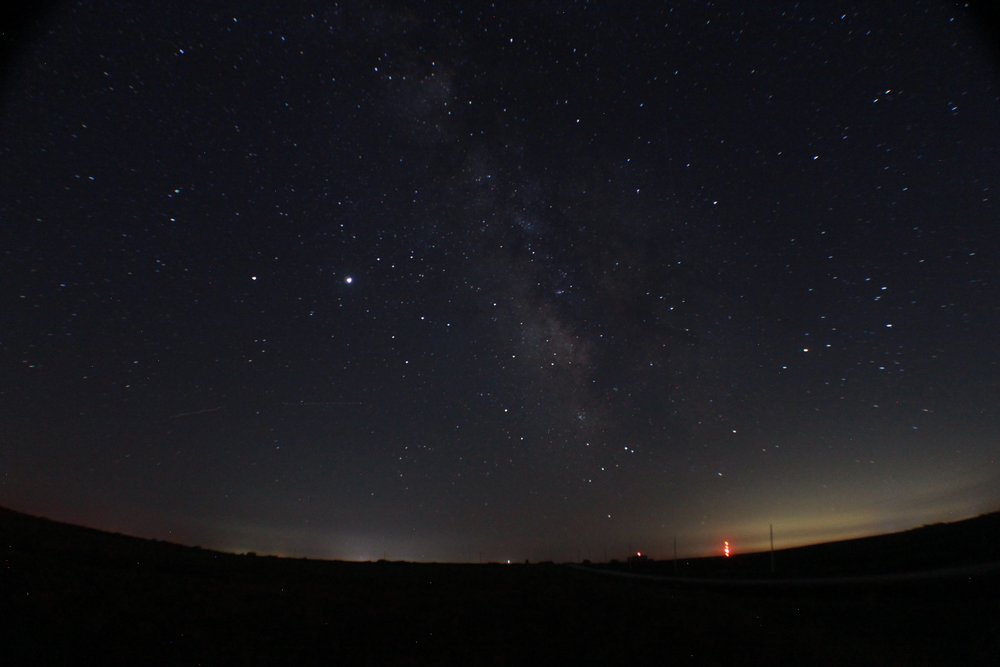
The following two pictures are 30 second exposures, with the aperture at the widest setting. (All of the following photos were taken in the middle of the Iowa corn fields. The glows on the horizon are farm lights, windmills, and the sky-glow over distant towns.)
With a “zoom” or “telephoto” lens on your camera, you can also record some beautiful things in the night sky that are normally too dim to see. For example, this is a photo I took of Orion's Belt and Sword, using a telephoto lens.
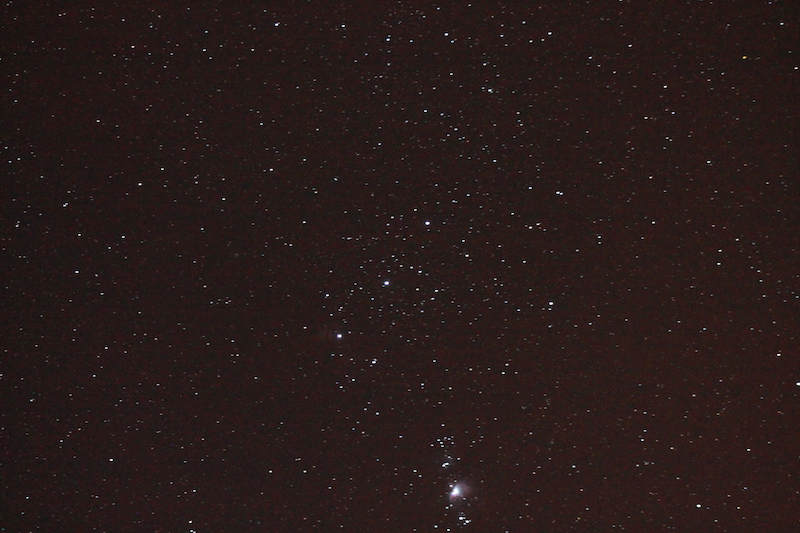
The diagonal row of three bright stars in the middle is Orion's Belt, and the vertical line of stars at the bottom is the sword dangling from Orion's Belt. (If you are familiar with how Orion looks in the night sky, then you have a sense for how much of the night sky this photo takes up. This photo was not taken through a telescope, merely an ordinary telephoto camera lens.) What this photo does is not so much to make far away things look closer and larger, but to make dim things brighter. The sky is rich with things that you can't normally see, because they are too dim. But a long-exposure photograph makes them visible. For instance, in the photo above, you can see the beautiful horde of dim, normally invisible stars filling the space within Orion. But it also reveals that one of the “stars” in Orion's sword is really a cloud. That's the Orion Nebula!
Most mobile devices have cameras, and most of these can also take long-exposure photographs with an appropriate app. Unfortunately, in addition to the exposure time, the size of the lens also makes a big difference in how nice your star photos will look. Mobile devices are generally intended to take photos in the daytime, and they usually have fairly small lenses. This means that even if you can take pictures of stars and constellations with your mobile device, they will probably look “grainy” and not as crisp and beautiful as those with a fancier camera. However, you can sometimes buy lens adaptors for mobile devices. Another trick that astrophotographers often use is “stacking.” Instead of one very long photograph, they take many photographs of the same thing, and then combine the pictures. Software to do this is not too hard to find. I've used StarStax and found it fairly easy to use.
Star Trail Photography
Now for the real fun. If you make really long exposures, the stars will move so much that you can see their trails. Normally, photographers want to avoid “motion blur,” but in the case of stars it's a beautiful way of tracking and recording how the stars are moving across the sky. The maximum exposure limit for my camera is 30 seconds, so I made the following by taking multiple exposures and “stacking” them together. I'm no photography expert, but I believe that this technique of “stacking” multiple exposures tends to produce better images than single very long exposures anyway. The following pictures were taken over intervals ranging from 15 minutes to one hour. (Knowing that one full circle corresponds to 24 hours, can you estimate the duration of each photograph from the length of the arcs?)
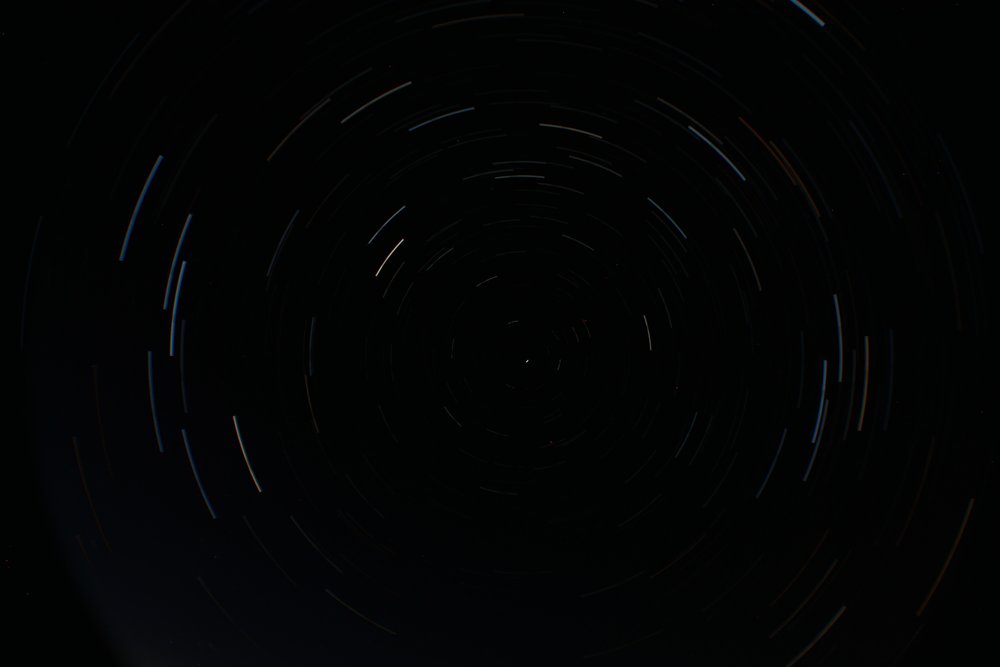
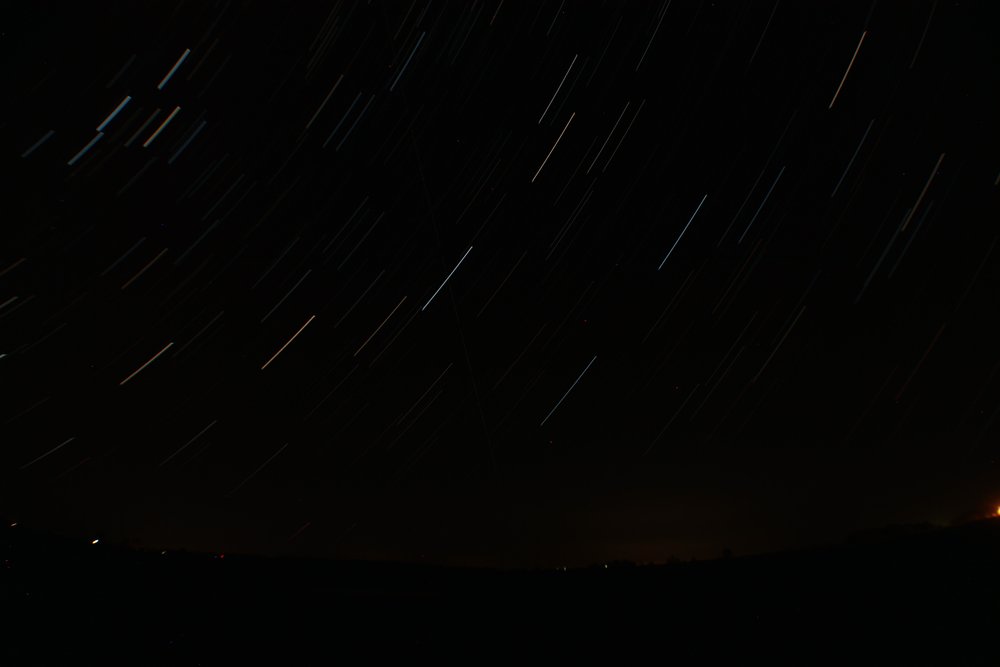
While I was making the following time-lapse photo, somebody drove by in a pickup truck, and I thought to myself: “Oh, great! Now I'm going to have a bright smear through my photo! Well...let's see how it turns out.” I actually like the final effect. The truck was driving south, away from me, so the white smear from the headlights wasn't too overpowering, and it was paralleled by a red smear from the tail lights, and the whole effect is quite pretty, in my opinion.

Star Motion Videos
Another way to visualize stellar motion would be to make a time-lapse video. I haven't tried this myself, but youTuber Aryeh Nirenberg has made dozens of gorgeous night sky movies, including a visualization of the Earth's rotation, in which the camera rotates with the stars — which makes it look as if the earth is rotating, instead of the sky!