
Printable Astrolabes
A color paper version of the classic celestial model and astronomical calculator, for students of astronomy to cut out and assemble.
Making the Paper Astrolabe
The paper astrolabe I am presenting here consists of five parts. There are the designs for the front and back sides, two swing-arms, and a disk containing the stars and constellations.
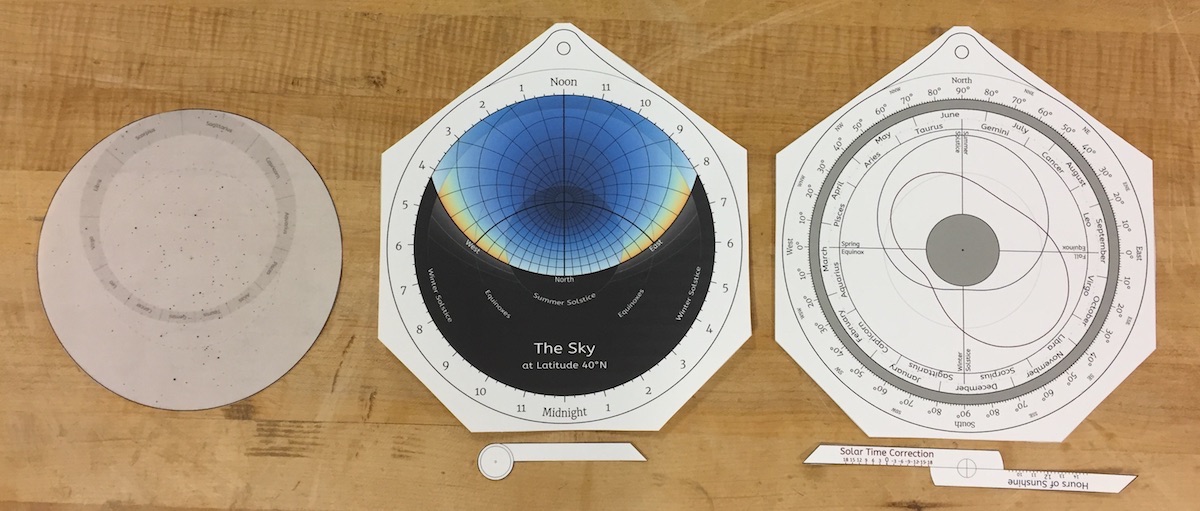
Start by selecting and downloading the appropriate design for your latitude.
The front and back sides will need to be printed onto card stock and placed back-to-back, to form the main body of the astrolabe. I’ve centered the designs on their respective pages, so you should be able to use the double-sided printing option of your printer to print them together on a single piece. However, in my experience, printers often produce small mis-alignments between the two sides. You may prefer to print and cut the front and back sides separately, then tape or glue them together back-to-back. That will produce a sturdier astrolabe anyway. If you do this, I recommend cutting out both sides along the polygonal outlines first, then gluing them back-to-back, then trimming the pair of them together to the circular outline. You may want to place a book or something on the astrolabe while the glue dries, to help reduce warping. You will also need to cut out the two swing-arms and set them aside until assembly.
The celestial disk will need to be printed separately, on a transparent or translucent material. My favorite material for this is vellum paper, but you could also use clear acetate sheets if you can find them. This should be cut out around the circular outline, and it should then fit exactly over the colored area on the front face of the astrolabe.
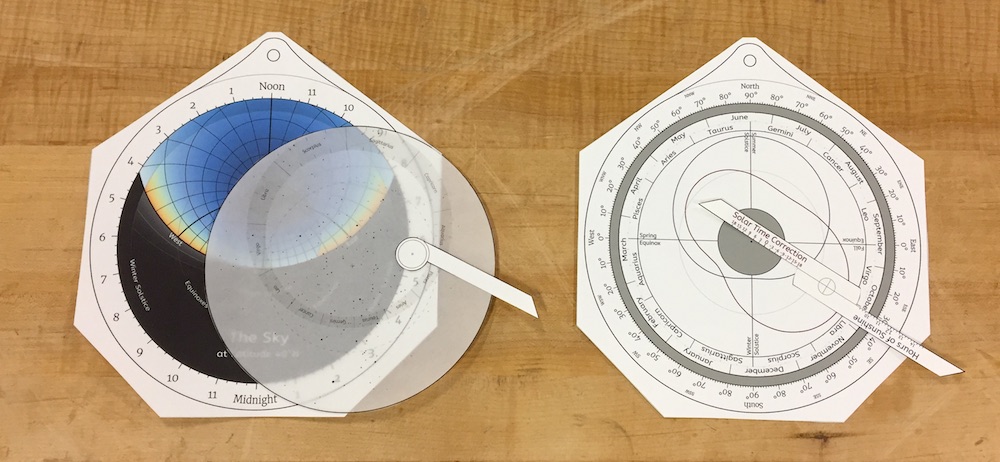
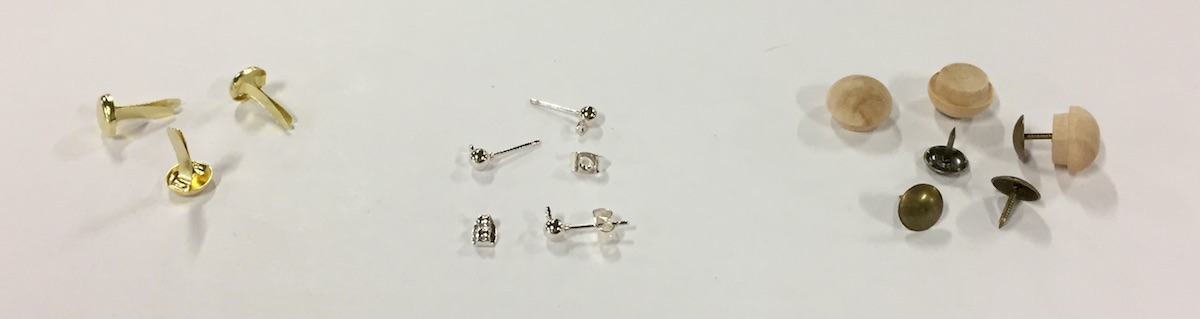
Finally, you will need to stack all of the parts together, and fasten them together with an axle-pin of some kind. The celestial disk should be placed over the front face of the astrolabe, with the single-arm swing arm over the top of it, and the double-arm swing arm is to be placed over the back side of the astrolabe. There are a few options you could use for the fastener. If you have those split-leg brass fasteners lying around, you could use one of those, but that wouldn’t be my recommendation. It will produce the flattest astrolabe, if you want to slip it into a pouch or pocket of some kind, but the back side probably won’t look nice, and the parts probably won't turn well. You could also try an earring post and back. This is simple, cheap, and effective, although the post sticks out sideways a bit too far for convenience. My favorite option would be to press a thumb tack (or a ‘decorative antique tack’ if you can find them) through all parts, then flip the assembly over and use a hammer to tap a ‘furniture button’ onto the point of the tack. You should be able to find all of these things at your local craft store.
Using the Paper Astrolabe
I think an astrolabe could be a fascinating and valuable tool for students of astronomy, and that it should be part of standard astronomy education. However, I think it should come at the end, not the beginning. You need to have covered a lot of ground, so to speak, before you can fully understand the workings of an astrolabe. On the other hand, once you are familiar with the basic goings-on in the sky, learning how to use an astrolabe should be a piece of cake.
Predicting the Time of Sunrise or Sunset
What time will the sun rise tomorrow? Start by finding today's date on the calendar on the back side of the astrolabe, and reading the name of the constellation listed next to it. This will tell you which constellation the sun is currently in. Note that I have not provided daily markings, but have simply provided tiny tick marks dividing each month and each constellation into fourths, and each fourth is approximately a week. For example, in the third week of April, the sun will be on the boundary between Pisces and Aries. In early February, the sun will be in the middle of Capricorn.
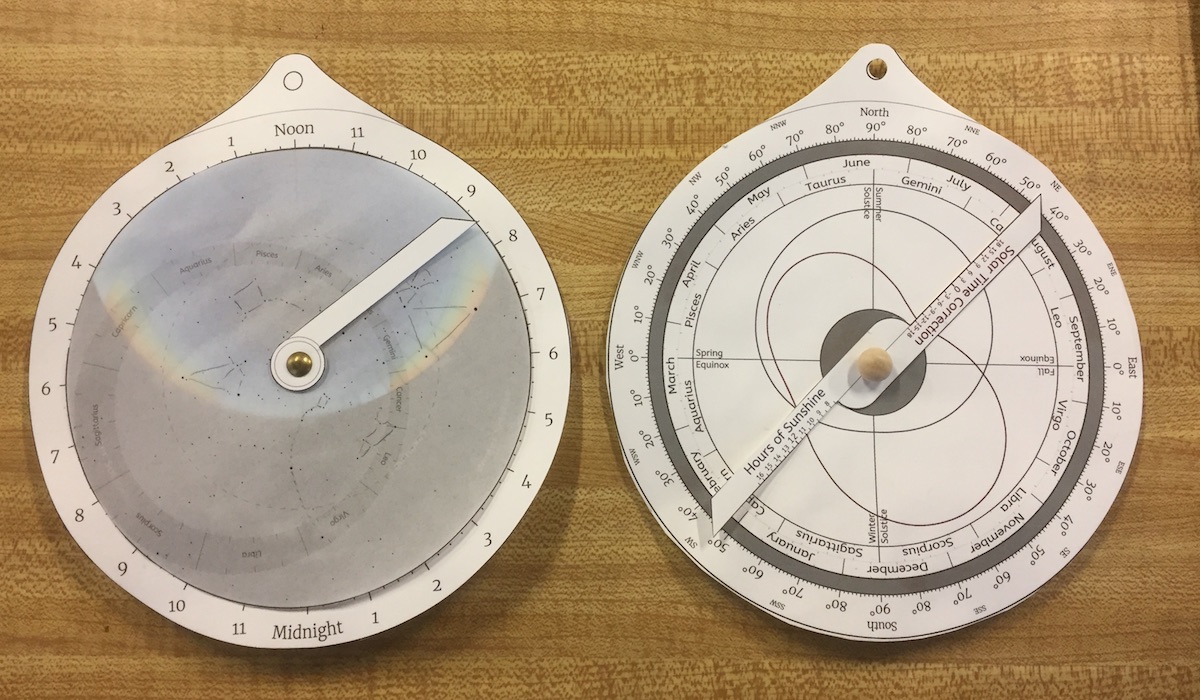
Now that you know which constellation the sun is in, mark the position on the front of the astrolabe by cutting out a small circle from the sticky part of a yellow Post-It Note, and placing it on the boundary between Pisces and Aries on the constellation disk. (Using an actual physical marker for the sun isn’t standard procedure, and it isn't strictly necessary. Once you get the hang of using an astrolabe, you just remember where the sun is. But for educational purposes I think it is very helpful to place a visual symbol.) Now you can set your astrolabe to any time of day by positioning the sun in the right place. To set your astrolabe to sunrise, turn the celestial disk until the sun is touching the eastern horizon. (In the color astrolabes, the horizon should be apparent as the boundary between the blue sky and the dark area ‘below the horizon’, and the eastern horizon is on the right side.) To read the time, swing the swing-arm until it crosses the sun, and it will point to the time of day. On an astrolabe designed for latitude 40°N, the sunrise in the third week of April should look like this:
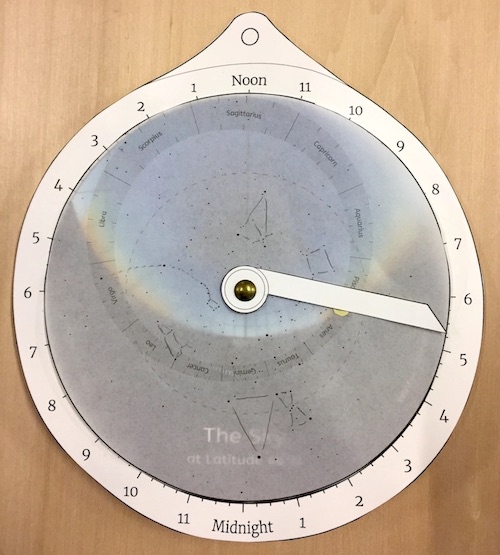
From the clock on the astrolabe, you can see that this happens at around 5:15AM. If you are familiar with your constellations, you can see that at this time, the Summer Triangle is high in the sky, and Arcturus is going down in the west. (On the color astrolabe, ‘high in the sky’ means near the dark blue part in the middle where all the curves meet.)
You can similarly find the time of sunset by placing the sun on the western horizon, on the left of the astrolabe. You can predict sunrise and sunset at any other time of year by first positioning the sun marker in the correct constellation for that time of year, and then rotating the celestial disk to position the sun on the horizon.
Showing the Stars Tonight
Which constellations will be out after dinner tonight? We start this problem in the same way, by finding out which constellation the sun is in, and by noting its position on the celestial disk. If we take early February for this example, we will need to place the sun marker in the middle of Capricorn. Again, we rotate the disk to position the sun in the sky. This time, however, instead of placing the sun on the horizon, we line up the sun with whichever hour we want. For example, if we want to set the astrolabe to 10pm, we turn the celestial disk until the sun is in the lower left of the astrolabe, lined up with the 10pm mark. We can use the swing arm to help make more precise alignments. In early February, at 10pm (at 40°N latitude), the sky should be arranged like this:
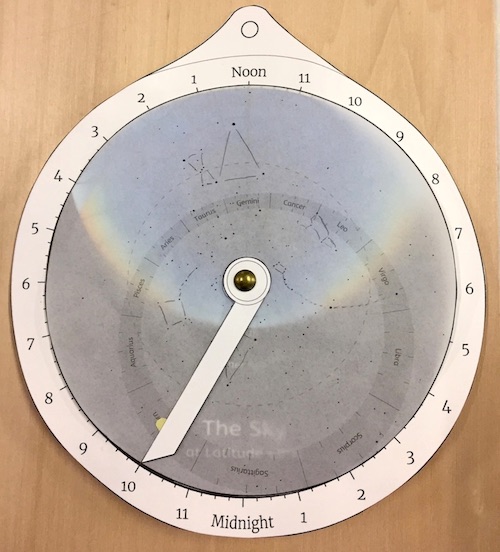
At this time, Arcturus will be just crossing the eastern horizon, following Leo into the sky, with Orion and the Winter Triangle high in the southern sky. (On the astrolabe, the southern sky is represented by the region across the top.)